Showing posts with label breakfast. Show all posts

Sunday, 27 March 2011

Daring Bakers - Meringue Filled Coffee Cake


The March 2011 Daring Baker�s Challenge was hosted by Ria of Ria�s Collection and Jamie of Life�s a Feast. Ria and Jamie challenged The Daring Bakers to bake a yeasted Meringue Coffee Cake. 
I am not one to jump right into the challenge recipe at the beginning of the month. I usually like to read the challenge over a few times, let it ruminate in my brain, pondering technique and flavors. However, since our family is trying to limit our sugar intake I thought that I would combine the challenge with another special date this month . . . my husband�s birthday which happens to fall early in the month.

Since Christmas, he has been asking for me to make the cinnamon rolls I made Christmas morning. I had planned to make them for his birthday breakfast so I begged and pleaded with him to let me make this coffee cake instead since they sounded fairly similar. He reluctantly agreed, offering to make a deal that if they were not as good I would still make the cinnamon rolls sometime this month. In my counter offer I asked who was to be the judge of whether they were equal. He stated he would try to be as unbiased as possible. Yah right, unbiased, my foot!


There were a few steps to this challenge but not any more so than a cinnamon roll or another sweet yeast bread recipe. It involved making the dough, letting it rise, kneading the dough, spreading it with meringue and adding filling, rolling it up, letting it rise again, and then baking it. Of course, there is a bit more to it than that but those are the steps in a nutshell.


The dough recipe made two braided wreath coffee cakes and while I seriously debated just doing one I decided that I would make two because in the end I wanted one that had the same cinnamon roll filling (for equal comparison) and then one that had chocolate in it.

Of the many times I�ve made yeast breads this was the first time of ever melting the butter mixture, adding the yeast to the dry flour and then adding a somewhat cooled butter mixture to the dry flour and yeast. 


Have I ever mentioned before how much I love kneading dough? I love it! Nothing makes me feel like a baker more than kneading soft dough after it is warm and has risen a first time! This particular dough didn�t require a lot of work to get it to the smooth, elastic stage so it was really nice to work with.


I don�t work with meringue often. I have really only made it a handful of times so I was a little more anxious to have this turn out correctly. It seemed to turn out fine. Nice stiff peaks and easy to spread on the dough.


Besides the coffee cakes looking like molten lava when they came out of the oven they tasted great! I thought the cinnamon/sugar filling was going to be way too sweet but it wasn�t too over the top. I think I did prefer the chocolate filling though but that might be because I really like chocolate. The one thing I forgot to do on both, and I�m not sure why, was to brush the egg wash on after baking. It didn�t really matter in the end because I sprinkled powdered sugar or cocoa powder over the finished product.


As for the unbiased ruling from the judge, it really wasn�t unbiased. He enthusiastically enjoyed both coffee cakes and then pronounced that I would have to make the cinnamon rolls in the end so that he could make an accurate comparison. Hmmm, kind of thought that was going to happen. 

Meringue Filled Coffee Cake

Yeast Coffee Cake:
4 cups flour
� cup sugar
� teaspoon salt
1 package active dried yeast
� cup whole milk
� cup water
� cup unsalted butter, room temperature
2 large eggs, room temperature

Meringue:
3 large egg whites, room temperature
� teaspoon salt
� teaspoon vanilla
� cup sugar

Filling:
1 cup chopped pecans or walnuts
2 tablespoons granulated sugar
� teaspoon ground cinnamon
1 cup semisweet chocolate chips or coarsely chopped chocolate

Egg wash: 1 beaten egg
Cocoa powder (optional) and confectioner�s sugar (powdered/icing sugar) for dusting cakes


Prepare the dough:
In a large mixing bowl, combine 1 � cups of the flour, the sugar, salt and yeast.

In a saucepan, combine the milk, water and butter and heat over medium heat until warm and the butter is just melted.

With an electric mixer on low speed, gradually add the warm liquid to the flour/yeast mixture, beating until well blended. Increase mixer speed to medium and beat 2 minutes. Add the eggs and 1 cup flour and beat for 2 more minutes.

Using a wooden spoon, stir in enough of the remaining flour to make a dough that holds together. Turn out onto a floured surface (use any of the 1 � cups of flour remaining) and knead the dough for 8 to 10 minutes until the dough is soft, smooth and elastic, keeping the work surface floured and adding extra flour as needed.

Place the dough in a lightly greased bowl, turning to coat all sides. Cover the bowl with plastic wrap and a kitchen towel and let rise until double in bulk, 45 � 60 minutes.

Prepare your filling:
In a small bowl, combine the cinnamon and sugar for the filling. You can add the chopped nuts to this if you like, but I find it easier to sprinkle on both the nuts and the chocolate separately.


Once the dough has doubled, make the meringue:
In a clean mixing bowl � ideally a plastic or metal bowl so the egg whites adhere to the side (they slip on glass) and you don�t end up with liquid remaining in the bottom � beat the egg whites with the salt, first on low speed for 30 seconds, then increase to high and continue beating until foamy and opaque. Add the vanilla then start adding the � cup sugar, a tablespoon at a time as you beat, until very stiff, glossy peaks form.

Assemble the Coffee Cakes:
Line 2 baking/cookie sheets with parchment paper.

Punch down the dough and divide in half. On a lightly floured surface, working one piece of the dough at a time (keep the other half of the dough wrapped in plastic), roll out the dough into a 20 x 10-inch rectangle. Spread half of the meringue evenly over the rectangle up to about 1/2-inch from the edges. Sprinkle half of your filling of choice evenly over the meringue.


Now, roll up the dough jellyroll style, from the long side. Pinch the seam closed to seal. Very carefully transfer the filled log to one of the lined cookie sheets, seam side down. Bring the ends of the log around and seal the ends together, forming a ring, tucking one end into the other and pinching to seal.

Using kitchen scissors or a sharp knife, make cuts along the outside edge at 1-inch intervals. Make them as shallow or as deep as desired but don�t be afraid to cut deep into the ring.

Repeat with the remaining dough, meringue and fillings.

Cover the 2 coffee cakes with plastic wrap and allow them to rise again for 45 to 60 minutes.

Preheat the oven to 350�F.

Brush the tops of the coffee cakes with the egg wash. Bake in the preheated oven for 25 to 30 minutes until risen and golden brown. The dough should sound hollow when tapped.

Remove from the oven and slide the parchment paper off the cookie sheets onto the table. Very gently loosen the coffee cakes from the paper with a large spatula and carefully slide the cakes off onto cooling racks.

Allow to cool. Just before serving, dust the tops of the coffee cakes with confectioner�s sugar as well as cocoa powder if using chocolate in the filling. These are best eaten fresh, the same day or the next day.
 
Makes 2 round coffee cakes, each approximately 10 inches in diameter. The recipe can easily be halved to make one round coffee cake.

Friday, 18 March 2011

Breakfast Pizza


My son requested breakfast pizza on a whim (mostly on a whim because he has never even had it nor seen one before) and it reminded me of a recipe that I happened to have in my cupboard. I would imagine that you know by now that I have a picky eater, so even though said son requested the breakfast pizza that didn't mean that he took more than a few cursory bites. Sigh. When will he become an adventurous eater?

This was delicious, a great change to plain old eggs and hashbrowns, and it was even great warmed up for lunch the next day. Enjoy!

*Note: This recipe does call for microwaving the eggs and I think you could get by with just scrambling them and cooking them in a pan like you normally would. If you shy away from microwaving food, this would definitely be an option. The only difference might be that the pieces are not quite as moist as if you microwaved them, but I think the difference would be pretty insignificant.

Breakfast Pizza
Source: Adapted from The Pampered Chef Stoneware Sensations

Crust
1 package (24 ounces) frozen shredded hash browns, thawed
1 egg, beaten
salt and ground black pepper to taste

Egg Topping
7 eggs
1/2 cup milk
salt and ground black pepper to taste
1 cup chopped ham (could use bacon or sausage)
1/2 cup sliced fresh mushroons
1/4 cup chopped bell pepper
1 1/2 cups (6 ounces) shredded cheddar cheese

Preheat oven to 400 degrees. Cover 15" round baking stone with parchment paper.

For crust, combine potatoes, egg, salt and pepper in a medium bowl; mix well. Spread potato mixture into a 14" circle on prepared stone; pat down with back of spoon. Bake 20 minutes; remove from oven.

For egg topping, whisk eggs and milk in bowl. Season with salt and black pepper. Microwave on high 3 minutes; stir. Microwave an additional 3 minutes; stir. Spread cooked egg mixture evenly over potato crust; top with ham, mushrooms, and bell pepper. Sprinkle with cheese. Return to oven. Bake 10 minutes.

To serve, cut into wedges. Makes 10 servings.

Tuesday, 8 February 2011

Green Smoothie


Great tasting and healthy for you! You can't go wrong with a green smoothie. I know this may not sound appealing to some of you, but you should at least give it a try before you form an opinion of it. I was a bit hesitant at first, but once I tried it I found I really enjoyed it. I've now converted 4 of my family members from totally resistant, to trying, to drinking them at least 4 times a week. Enjoy!

Side Note: We usually drink a smoothie in place of a meal. We've had them for breakfast, lunch, and dinner. If you drink it by itself it doesn't have much staying power, but you will be amazed at how much one slice of whole grain toast with your smoothie will fill you up more than just the smoothie itself. 

Green Smoothies
Makes a single serving

Base to start with:
20 large grapes or 25 small grapes
3/4 cup fresh pineapple, chunked
2 cups spinach leaves
1 tablespoon flax
6-8 ice cubes

Optional Add-ins:
1/2 banana
1/2 orange
1/2 apple
veggies or other fruits

Completely blend all ingredients.

Saturday, 5 February 2011

Aebleskivers with Chopped Apples


Every year we go to the local fair where my husband visits the stand that sells poffertjes. He usually makes 2 or 3 visits during our day at the fair because he enjoys them so much. I think that he may like the sweet whipped butter more than the poffertjes, but you can't have one without the other. When I saw an Aebleskiver pan, I knew that it would be a great purchase for our family.

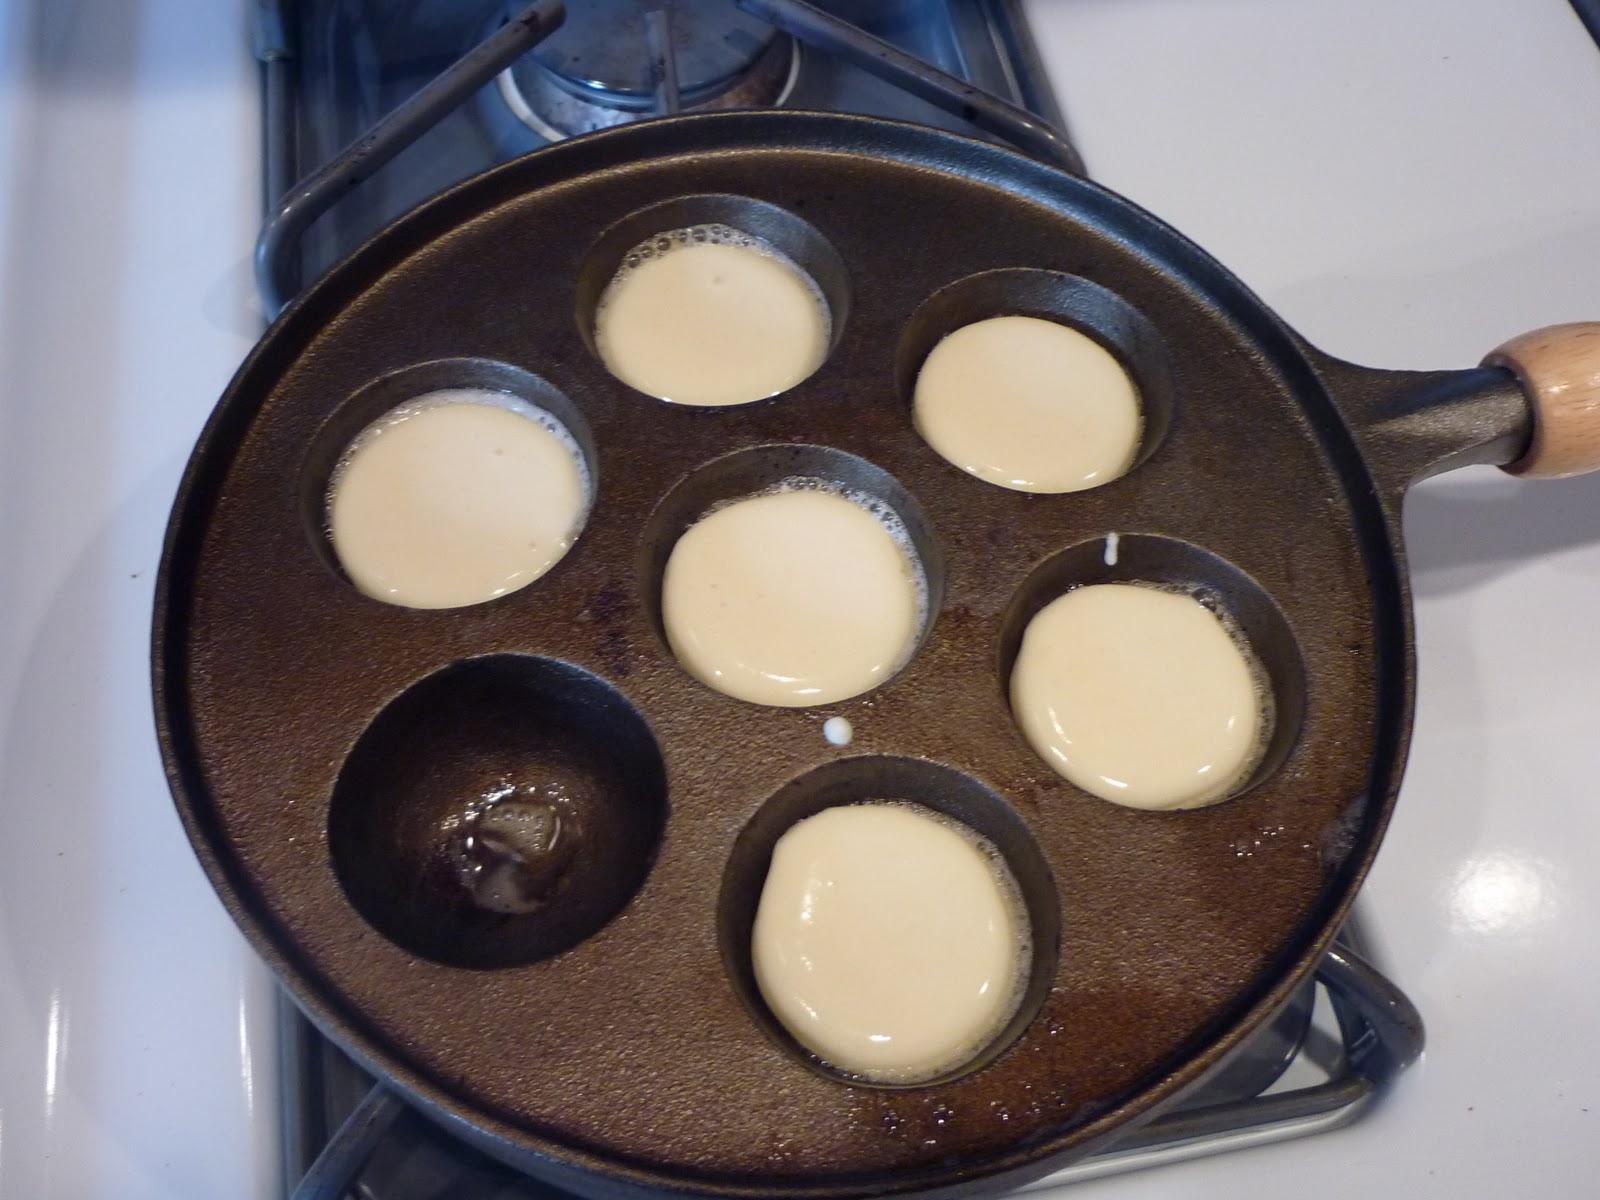
We haven't had too many varieties yet, but it will only be a matter of time. For our first batch we used an apple pie filling that we had left over from a camping trip. It was fun to get our pan seasoned and to experiment with the cooking method.


Without realizing it, we also used apples for our second batch. This time though it was just finely chopped apple chunks since I wanted to make Aebleskivers but was still fasting from sugar. I know, nutella and chocolate filled sound delicious and we will eventually try those as well, but we wanted to stick with a somewhat healthy Aebleskiver for breakfast instead of dessert. These are really fun to make and taste pretty much like a little round pancake. Enjoy!


Basic Aebleskiver Recipe
Makes many little Aebleskivers!

2 cups flour
1 teaspoon salt
1 teaspoon baking soda
2 cups buttermilk
3 eggs, separated

Sift together flour, salt and baking soda. Add buttermilk and egg yolks. Beat eggs whites until light and fluffy, forming soft peaks. Gently fold egg whites into batter.

Heat Aebleskiver pan on medium heat. Grease each cup with butter and fill 2/3 full. Cook for approximately 1-2 minutes per side, flip using a toothpick. When both sides are done serve with a sprinkle of confectioner�s sugar. Best when served warm.

Optional: Fill each cup only 1/3 full with batter and place a small amount of fruit or topping in each cup and cover with an additional 1/3 batter.

Monday, 3 January 2011

Cheesy Potato Casserole


Cheesy Potato Casserole (aka Hashbrown Casserole) is an easy, hearty side dish. I often take this to a MOPS meeting when I am signed up to bring a breakfast dish, but I also have made it to accompany a lunch or dinner as well. Very versatile in that you can make it at any time of the day, but also versatile in what you can add to the actual casserole. There's not much to say about this dish that I haven't already said so I'll just jump right into the recipe. Enjoy!

Cheesy Potato Casserole
Makes a 9x13 pan

1 large bag of frozen hashbrowns (cubed style)
1 can cream of chicken soup
8 oz. sour cream
4 cups cheddar cheese
3 tablespoons butter
4 cups cornflakes

Optional Mix-ins:
diced green chilies, spinach, green bell peppers, ham, bacon . . . (I add the diced green chilies)

Preheat oven to 350 degrees. Grease a 9x13 baking dish. Stir together the hashbrowns, cream of chicken soup, sour cream, and cheddar cheese in a large bowl. Add any mix-ins. Pat into baking dish.

Melt butter in a large skillet, then add cornflakes and saute until slightly crispy/light brown. Put the cornflakes on top of the potato mixture.

Bake for 30 minutes or until bubbly. Let sit 15 minutes before serving, it will stay together better.

Tuesday, 28 December 2010

Cream Cheese Cinnamon Rolls

 
Cream cheese cinnamon rolls . . . what a great thing to partake of on Christmas morning! This happens to be the second Christmas in a row that we have woken up and feasted on cinnamon rolls, last year it was after present opening and this year it took place before. The big difference is that this year I was prepared and decided to make up the rolls the night before so I could relax with my family on Christmas morning. Boy am I glad I did!  

These particular rolls are amazing and have just the right combination of sweet bread, raisins, nuts, and icing. Although they are a bit of work on the front end they are definitely worth it! My husband is still talking about them a few days later and already has a request in for the next batch.

Stay tuned for the abbreviated step by step photos after the recipe. You can find many delectable treats at the site where I got this recipe. (Thanks for a great recipe, Joy!) Enjoy!

(Oh, by the way, if you like your icing drizzled you only need to make half a batch. If you like it coated heavily, stick with a full batch. Get it . . . "stick".)

Cream Cheese Cinnamon Rolls
Source: Joy the Baker

Dough:
1 -1/4 oz package active dry yeast
1/2 teaspoon, plus 1/4 cup sugar
1/4 cup water, heated to 115 degrees 
1/2 cup milk at room temperature
2 tablespoons light brown sugar
1/2 teaspoon vanilla extract
1 egg
1 egg yolk
2 3/4 cups all-purpose flour, sifted, plus more for kneading
3/4 teaspoon salt
8 tablespoons (1/2 cup) unsalted butter, at room temperature, plus more for the pan

Filling:
1/2 cup sugar
1/4 cup dark brown sugar
1/4 cup finely chopped pecans
1/4 cup finely chopped walnuts
1/4 cup raisins
1 tablespoon ground cinnamon
1/2 teaspoon salt
1/8 teaspoon ground cloves
2 tablespoons maple syrup
4 oz cream cheese, at room temperature
8 tablespoons (1/2 cup) unsalted butter, melted

Icing:
2 cups confectioner's sugar
1/4 cup buttermilk

In the bowl of a stand mixer combine yeast, 1/2 teaspoon sugar and 1/4 cup water heated to 115 degrees F. Stir to combine and let sit until frothy and foamy, about 10 minutes.

Add remaining sugar, milk, light brown sugar, vanilla, egg, and egg yolk. Beat with a wire whisk until well combined. Fit the bowl onto the mixer, fitting with the dough hook attachment. Add the flour and salt and mix on medium speed until the dough just begins to come together. Turn the machine on medium-high and knead the dough for 4 minutes.

Add the butter and continue to knead for about 6 minutes. The dough will be wet and sticky. Place the dough on a well floured work surface, and knead about 1/3 cup all-purpose flour into the dough. Set the dough in a large greased bowl to rest. Cover the bowl with plastic wrap and a kitchen towel and allow to rise in a warm place for 1 1/2 to 2 hours, or until doubled in size.

While the dough rises, make the filling. Combine the sugar, dark brown sugar, pecans, walnuts, raisins, cinnamon, salt, and cloves into a large bowl. Stir to combine. Stir in the maple syrup. Set aside.

When the dough has doubled in size, dump it from the bowl onto a heavily floured work surface. Gently knead the dough until it is no longer sticky, adding flour as needed. Work the dough for about 1 to 2 minutes. Once it's no longer sticky, place a kitchen towel over the dough and let rest for 5 minutes before you roll it out. In a small bowl, mix the cream cheese with a knife until it is smooth and spreadable.

Using a floured rolling pin, roll the dough into a 10x10 inch square or circle. Spread the cream cheese evenly over the dough. Fold into thirds like you would fold a letter to fit into an envelope. Take the open ends of the rectangle and it into thirds again, to make a smaller dough square.

Invert the dough so that the seam is face down and use the rolling pin to gently roll it into a 10x20 inch rectangle. You may find that some cream cheese sneaks through. Turn the dough so that the short sides are parallel to you. You will roll from the short sides of the dough.

Brush the top of the dough with half of the melted butter. The rest of the butter will be for after the rolls are baked. Pour all of the filling onto the dough. Spread evenly, leaving a 1-inch border at one of the short edges of the dough so the roll can be properly sealed. Lightly press the filling into the dough.

Using your hands, lift up the bottom edge of the dough and roll it forward into a tight cylinder. Place dough cylinder seam side down on a cutting board. Using a sharp, thin knife (or dental floss), trim off the uneven edges (or keep them in for a few uneven slices). Cut cylinder into 8 equal slices.

Nestle slices, cut side up and evenly space in a buttered 9x13 metal baking dish. Cover pan with plastic wrap and set aside in a warm place to let rise for 2 hours. You may also refrigerate the rolls overnight.

Heat oven to 375 degrees F. Uncover the rolls. If you refrigerated the rolls, let them sit at room temperature for 15 minutes before baking. Bake until golden brown and a toothpick inserted in the center comes out clean, about 30 minutes.

While the rolls are baking, whisk together the sugar and buttermilk in a small bowl until smooth.

Transfer the pan of cinnamon rolls to a cooling rack. Brush with remaining melted butter. Let cool for 5 minutes. Dip the tines of a fork into the icing and drizzle over the rolls. Serve immediately.


 The yeast getting frothy . . . the dough getting kneaded 
(or rather beaten to death in the kitchenaid) . . .

Dough ready to be gently kneaded, then set to rise for the first 2 hours . . . filling mixed . . .

Kneaded after rising . . . cream cheese spread . . . first fold . . . second fold . . .
third/fourth fold . . . rolled out in rectangle . . . filling spread . . . 

Perfectly sliced rolls (notice the dental floss) . . . ready for a second rising (or the fridge) . . . 
perfectly golden brown!
 

Tuesday, 16 November 2010

Pumpkin Pancakes


These pancakes got rave reviews when we had them on Halloween morning! I had made regular, buttermilk, apple, and blueberry pancakes but had yet to make a pumpkin variety. I thought that since our pumpkin carving would be taking place later that afternoon pumpkin pancakes would be a great way to start the day. My son loved them! He asked for seconds, thirds, and fourths. We sprinkled a bit of powdered sugar on some, and drizzled maple syrup on others. Both seemed to go over well and they went down without a fight!
The batter started out a bit thicker than I like so I added a bit of buttermilk to thin it out.
Enjoy!

Pumpkin Pancakes
Source: Pinch My Salt

1 cup whole wheat flour
1/2 cup cake flour
1 teaspoon baking soda
2 teaspoons baking powder
1/4 teaspoon salt
1 teaspoon ground cinnamon
1/2 teaspoon ground ginger
1/2 teaspoon ground nutmeg
1 cup buttermilk
1 cup pumpkin puree (can use canned puree)
2 eggs
2 teaspoons oil
1 teaspoon vanilla
2 teaspoons dark brown sugar

In a large bowl, whisk together the first eight ingredients (the whole wheat flour through nutmeg). In a separate bowl, whisk together the remaining ingredients (buttermilk through brown sugar). Mix wet and dry ingredients together, just until combined. (If batter is a bit thick, add buttermilk.)

Drop pancakes onto a medium-hot griddle. Pancakes are ready to flip when the edges start to turn dry and it looks like small bubbles are forming on the surface.

Wednesday, 27 October 2010

Daring Bakers - Doughnuts


The October 2010 Daring Bakers challenge was hosted by Lori of Butter Me Up. Lori chose to challenge DBers to make doughnuts. She used several sources for her recipes including Alton Brown, Nancy Silverton, Kate Neumann and Epicurious.


I don't think it is a coincidence that my last recipe post was about apple spice cake and my daring bakers post is about apple fritters. Nope, not a coincidence at all! I told you when Fall rolls around I have apples, pumpkins, and spices on the brain. I think apple fritters have to be my all time favorite doughnut, but over the years my tastes seem to change with my age. I have turned more to cake doughnuts in the last few years when I frequent local bakeries and doughnut shops, and have shied away from the deep fried flavor and texture of the fritter.

In some ways I am a bit surprised at what I am about to post. I had never, before this challenge, fried anything. I know, shocking, huh. My deep frying thermometer has only been used for making candy up until this point. I think that for some reason I just have this inherent dislike for anything deep fried. Don't get me wrong, I will occasionally partake of some deep fried goody, but on the whole it's just not a part of our diet. Plus, I am really not a fan of having the smell hang in the air for hours, but that's beside the point.

We were presented with many doughnut recipes to choose from, but because I really wanted an apple fritter and I wasn't sure what made it a fritter compared to a cake or yeast doughnut I decided to just find my own recipe. The one I chose was so easy! You can whip it up in a bowl with a wooden spoon, no electric mixer required and no wait time for the yeast to do it's job for the doughnuts to rise.  I know it doesn't look like much, but it smells and taste wonderful!


I was a bit anxious about the deep frying portion of this challenge. I think part of that was because I had no idea what to expect, but also the thought of oil being heated to 360 degrees Fahrenheit makes me very wary. It actually went quite smoothly. I wasn't sure whether the oil would have a rolling boil or what, but it did not change in its look at all. In fact, if there wasn't a thermometer in there you wouldn't have even known the temperature changed. The hardest parts had to be dropping the dough off of the spoon so that it didn't splash the oil and having it stay together as one piece of dough. The neat thing about the apple fritters was that they were almost self-regulating for their cooking time on each side. It was about 1 minute 20 seconds for the first side and most of them would flip over on their own to cook the second side. Almost like they had little internal clocks or something!


After another minute or two on the other side, I fished them out of the pan, set them on paper towels to get the outer coating of oil off, and then set them on a wire rack. I then either dusted with cinnamon and sugar or I drizzled with a powdered sugar icing. Both coatings were delicious! You can see how light and airy they ended up cooking, and there were a few of the thicker ones that had a teeny bit of wet dough in the middle so you'll want to make sure you cook them long enough. Enjoy!


Apple Fritters
Source: No Fear Entertaining and The Picky Apple


Fritter:
1 cup all-purpose flour
1/4 cup sugar
3/4 teaspoon salt
1 1/2 teaspoons baking powder
1 teaspoon cinnamon
1/3 cup milk
1 egg
1 cup chopped apple

Glaze:
2 cups powdered sugar
1 1/2 tablespoons milk

Combine flour, sugar, salt, baking powder, and cinnamon. Stir in milk and egg until just combined. Fold in apple; set aside. Make the glaze by stirring milk and powdered sugar together in a small bowl; set aside.

Heat about 48 ounces of a flavorless oil (like Canola) on high. Oil is ready when it reaches 365 degrees (or when dough floats to top). Carefully add dough to oil in heaping teaspoons. Cook until brown, about 1 1/2 to 2 minutes, then flip. Cook another 1-2 minutes, until both sides are browned.

Transfer briefly to paper towels to absorb excess oil, then transfer to cooling rack. Drizzle with glaze or coat with sugar/cinnamon mixture. Best served warm.