Showing posts with label daring bakers. Show all posts

Thursday, 27 October 2011

Daring Bakers - Povitica


 The Daring Baker�s October 2011 challenge was Povitica, hosted by Jenni of The Gingered Whisk. Povitica is a traditional Eastern European Dessert Bread that is as lovely to look at as it is to eat!

I have seen Povitica in mail-order specialty food catalogs and have always been intrigued by it. I love specialty foods, especially if they come in the form of sweet breads! I rarely purchase any of these foods, a little too rich for my wallet, but I definitely drool over the photos. You can imagine then that I really looked forward to baking this months challenge.

Povitica (pronounced poh-vee-teet-sa) is also called potica depending on what Eastern European country you come from. It is always fun completing challenges that are based in cultures different from mine.

I thought that the best part of this challenge was cutting into the bread! It was almost like opening a present on Christmas morning and not knowing what you were going to get. The outside packaging was so unassuming so I was on pins and needles waiting to see how the swirls turned out. You can see from the photos at the top that the two loaves of bread turned out quite different. But even within the same loaf the swirling was varied. The photo on the top left is the same loaf as the photo below, but one cut was made in the middle where the two ends met and there was less filling and the other cut was toward the end of the bread in the heart of the filling.


I did have some issues with the dough which I guess can be expected when you have to roll it out until it is almost transparent. Let's just say I didn't get it quite that thin. I know I complained last month about having to roll dough out to a certain size or shape but this month it was almost the other extreme. I wasn't sure how big I was supposed to roll it out nor what shape it was supposed to be in. At one point the directions said a 10-12 inch diameter which suggests a circle, but the rolling up process suggests a rectangle. I'm still not 100% sure and I think I got a cross between the two shapes. Mine looked a bit more like a wrinkly elephant ear.

I also ran into trouble with trying to figure out what type of filling to use. I decided to bake only two loaves instead of a full batch of 4 and I knew I wanted to use the traditional walnut for one of the fillings. At first I thought I would use a sweet pecan filling for the other but then I realized it would be too close to the walnut. Then I thought I'd use a cream cheese chocolate chip filling but I realized I didn't have cream cheese and I forgot to stop by the store twice when I had the opportunity so that was a no go. I finally scrounged in my fridge and realized I had a jar of apple butter which I could top with raisins and a few chopped walnuts. I think I liked the walnut filling better since it was a bit more mild when paired with the bread, but there were sometimes that I did like the tartness of the apple butter.

I enjoyed making this bread and now that I know a few tricks on how to and not to roll it out I think I will be making this around the holidays for some special gifts.

Povitica
Makes 4 loaves

Activate Yeast:
2 teaspoons sugar
1 teaspoon all-purpose flour
1/2 cup warm water
2 tablespoons dry yeast

Dough:
2 cups whole milk
3/4 cup sugar
3 teaspoons table salt
4 large eggs
1/2 cup unsalted butter, melted
8 cups all-purpose flour, sifted then divided

Walnut Filling:
7 cups ground walnuts
1 cup whole milk
1 cup unsalted butter
2 whole eggs, beaten
1 teaspoon pure vanilla extract
2 cups sugar
1 teaspoon unsweetened cocoa powder
1 teaspoon cinnamon

Topping:
1/2 cup cold strong coffee
2 tablespoons granulated sugar
melted butter

To Make the Dough and Activate Yeast:
In a medium saucepan, heat the milk up to just below boiling (about 180 degrees F), stirring constantly so that a film does not form on the top of the milk. Allow to cool slightly until it is about 110 degrees F.

In a small bowl, stir 2 teaspoons sugar, 1 teaspoon flour, and the yeast into 1/2 cup warm water and cover with plastic wrap. Allow to stand 5 minutes.

Once milk is cooled to 110 degrees F, mix the scalded milk, 3/4 cup sugar, and the salt until combined. Add the beaten eggs, yeast mixture, melted butter, and 2 cups of flour. Blend thoroughly; slowly add remaining flour, mixing well until the dough starts to clean the bowl.

Turn dough out onto floured surface and knead, gradually adding flour a little at a time, until smooth and does not stick. (You may not use all your flour.) Divide the dough into 4 equal pieces (they will weigh about 1.25 pounds each). Place dough in 4 lightly oiled bowls, cover loosely with a layer of plastic wrap and then a kitchen towel and let rise an hour and a half in a warm place.

To Make the Filling:
In a large bowl, mix together the ground walnuts, sugar, cinnamon and cocoa. Heat the milk and butter to boiling. Pour the liquid over the nut/sugar mixture. Add the eggs and vanilla and mix thoroughly. Allow to stand at room temperature until ready to be spread on the dough. (If the mixture thickens, add a small amount of warm milk.)

To Roll and Assemble the Dough:
Spread a clean sheet or cloth over your entire table so that it is covered. (I had to clip mine down so the cloth didn't move.) Sprinkle with a couple of tablespoons to a handful of flour (use flour sparingly).

Place the dough on the sheet and roll the dough out with a rolling pin, starting in the middle and working your way out, until it measures roughly 10-12 inches in diameter. Spoon 1 to 1.5 teaspoons for melted butter on top and work into dough. (This part made my edges stick to my sheet.)

Continue to roll out your dough until it is thin enough to see the print of the sheet through it. Spoon filling evenly over dough until covered. Lift the edge of the dough and gently roll it jelly roll style. (You can also roll both edges in toward center until they meet - it will look like to long rolls sitting next to each other.)

Once the dough is rolled up into a rope, gently lift the end and fold it back to the halfway point. Then lift the other end and fold it back to the halfway point. Flip it upside down (seam side down) and set in greased loaf pan.

Brush the top with the coffee topping mixture or if you prefer, you can also used egg whites in place of coffee mixture. Cover pans lightly with plastic wrap and allow to rest for approximately 15 minutes.

Preheat oven to 350 degrees F. Remove plastic wrap from dough and place in preheated oven and bake for approximately 15 minutes. Turn the oven temperature down to 300 degrees F and bake for an additional 45 minutes. (Check bread every 30 minutes - if it is browning too fast cover loosely with aluminum foil.)

Remove bread from oven and brush with melted butter. Allow to cool in loaf pan until completely cool. It is recommended to slice it by turning it upside dough and slicing with a serrated knife.

Half Batch Ingredients:
Makes 2 loaves

Activate Yeast:
1 teaspoon sugar
1/2 teaspoon all-purpose flour
1/4 cup warm water
1 tablespoon dry yeast

Dough:
1 cup whole milk
6 tablespoons sugar
1 1/2 teaspoons table salt
2 large eggs
1/4 cup unsalted butter, melted
4 cups all-purpose flour, sifted then divided

Walnut Topping:
3 1/2 cups ground walnuts
1/2 cup whole milk
1/2 cup unsalted butter
1 whole egg, beaten
1/2 teaspoon pure vanilla extract
1 cup sugar
1/2 teaspoon unsweetened cocoa powder
1/2 teaspoon cinnamon

Topping:
1/4 cup cold strong coffee
1 tablespoon granulated sugar
melted butter

Quarter Batch Ingredients:
Makes 1 loaf

Activate Yeast:
1/2 teaspoon sugar
1/4 teaspoon all-purpose flour
2 tablespoons warm water
1 1/2 teaspoons dry yeast

Dough:
1/2 cup whole milk
3 tablespoons sugar
3/4 teaspoons table salt
1 large egg
1 tablespoon unsalted butter, melted
2 cups all-purpose flour, sifted then divided

Walnut Topping:
1 3/4 cups ground walnuts
1/4 cup whole milk
1/4 cup unsalted butter
1 egg yolk from a large egg, beaten
1/4 teaspoon pure vanilla extract
1/2 cup sugar
1/4 teaspoon unsweetened cocoa powder
1/4 teaspoon cinnamon

Topping:
2 tablespoons cold strong coffee
1 1/2 teaspoons granulated sugar
melted butter

Tuesday, 27 September 2011

Daring Bakers - Croissants


 The Daring Bakers go retro this month! Thanks to one of our very talented non-blogging members, Sarah, the Daring Bakers were challenged to make Croissants using a recipe from the Queen of French Cooking, none other than Julia Child!

Another Daring Bakers challenge where I am coming in just under the wire! It seems to be a busy time of year for me and I ended up putting my challenge off until the last weekend of the month, not knowing that I would be attending my grandfather's funeral this weekend nor that my son would be hosting preschool snacks on Monday and would want to take homemade sugar cookies. Baking did end up being a bit cathartic for me, but it also meant that it didn't get all of my attention.

Here I am, two and a half hours before the challenge deadline starting my write up while my croissants are in their last few minutes of proofing as the oven preheats to it's scorching temperature of 475 degrees F. I will admit right up front that I did get a bit frustrated with this experience toward the end. I have no idea what my croissants are going to look like in 7 minutes when they come out of the oven. There is definitely a smell of cooked egg wafting through the air right now as the countdown continues on.

I would consider myself an experienced bread and pastry maker, but I really bristle when a recipe tells me to roll an item out to a certain shape or size. Really, how many people can get it to the size the recipe calls for let alone the shape? I don't know about you, but my dough seems to have a mind of its own when it is sitting on my counter resisting my methods of carefully shaping and measuring. That being said, a few of my croissants are less like croissants and more like little puff pastry footballs and crescent moons and dolphins jumping out of the water.

Can I get a drumroll, please, as these come out of the oven? The bottoms smell a bit toasty. Burned or is it just the egg wash around the edges and on the pan? They are a little dark but the burnt taste is not there so that's a sigh of relief. And to the most important question: how do they taste? Great! They are light and flaky with just a hint of buttery flavor. I think I can count this challenge as a success, even though the dough rolling had me glaring at my rulers and uncooperative dough. Enjoy!

Croissants
Source: Mastering the Art of French Cooking, Volume Two by Julia Child and Simone Beck

1� teaspoon dry-active yeast
3 tablespoons warm water (less than 100�F)
1 teaspoon sugar
� cup milk
1� teaspoon salt
2 teaspoons sugar
1 3/4 cups bread flour
2 tablespoons tasteless oil
� cup chilled, unsalted butter
1 egg, for egg wash

Mix the yeast, warm water, and one teaspoon of sugar in a small bowl. Set aside for the yeast and sugar to dissolve and the yeast to foam up a little.

Heat the milk until tepid (either in the microwave or a saucepan), and dissolve in the salt and 2 teaspoons sugar.

Place the flour in a large bowl. Add the oil, yeast mixture, and milk mixture to the flour. Mix all the ingredients together using the rubber spatula, just until all the flour is incorporated

Turn the dough out onto a floured surface and let it rest a minute. Knead the dough eight to ten times only by smacking the dough on the counter and removing it from the counter using the pastry scraper. Place the dough back in the bowl, cover with plastic wrap and a towl. Leave the bowl at approximately 75�F for three hours, or until the dough has tripled in size.

After the dough has tripled in size, remove it gently from the bowl, pulling it away from the sides of the bowl with your fingertips. Place the dough on a lightly floured board or countertop and use your hands to press it out into a rectangle about 8 by 12 inches. Fold the dough rectangle in thirds, like a letter (fold the top third down, and then the bottom third up). Place the dough letter back in the bowl, cover with the plastic wrap and towel. Leave the dough to rise for another 1.5 hours, or until it has doubled in size. (This second rise can be done overnight in the fridge.)

Place the double-risen dough onto a plate and cover tightly with plastic wrap. Place the plate in the fridge while you prepare the butter. Place the block of chilled butter on a chopping board. Using the rolling pin, beat the butter down a little until it is quite flat. Use the heel of your hand to continue to spread the butter until it is smooth. You want the butter to stay cool, but spread easily.

Remove the dough from the fridge and place it on a lightly floured board or counter. Let it rest for a minute or two. Spread the dough using your hands into a rectangle about 14 by 8 inches. Remove the butter from the board and place it on the dough rectangle, spreading the butter across two-thirds of the rectangle but keeping it a � inch from all the edges.

Fold the top third of the dough down, and the bottom third of the dough up. Turn the dough 90 degrees so that the top flap is to your right (like a book). Roll out the dough (gently, so you don�t push the butter out of the dough) until it is again about 14 by 8 inches. Again, fold the top third down and the bottom third up. Wrap the dough in plastic wrap and place it in the fridge for 2 hours.

After two hours have passed, take the dough out of the fridge, unwrap it, and place it again on the lightly floured board or counter. Tap the dough with the rolling pin to deflate it a little. Let the dough rest for 8 to 10 minutes. Roll the dough out until it is 14 by 8 inches. Fold in three, as before. Turn 90 degrees and roll out again to 14 by 8 inches. Fold in three for the last time, wrap in plastic, and return the dough to the fridge for two more hours (or overnight, with something heavy on top to stop it from rising).

Lightly butter your baking sheet so that it is ready. Take the dough out of the fridge and let it rest for ten minutes on a lightly floured board or counter. Roll the dough out to a 20 by 5 inch rectangle. Cut the dough into half which will yield two rectangles (each 10 by 5 inches ). Place one of the rectangles in the fridge to keep the butter cold.

Roll the rectangle to a 15 by 5 inch rectangle. Cut the dough into three squares (each 5 by 5 inches). Place two of the squares in the fridge. The remaining square may have shrunk up a little bit in the meantime so roll it out again until it is nearly square. Cut the square diagonally into two triangles. Stretch the triangle out a little, so it is not a right-angle triangle, but more of an isosceles. Starting at the wide end, roll the triangle up towards the point, and curve into a crescent shape. Place on the baking sheet. Repeat the process with the remaining squares of dough, creating 12 croissants in all. Leave the tray of croissants on the counter, covered lightly with plastic wrap, to rise for 2 hours.

Preheat the oven to 475�F. Mix the egg with a teaspoon of water. Spread the egg wash across the tops of the croissants. Put the croissants in the oven for 12 to 15 minutes or until the tops are browned nicely. Take the croissants out of the oven and place them on a rack to cool for 10 minutes before serving.

Saturday, 27 August 2011

Daring Bakers - Candylicious!


The August 2011 Daring Bakers� Challenge was hosted by Lisa of Parsley, Sage, Desserts and Line Drive and Mandy of What the Fruitcake?!. These two sugar mavens challenged us to make sinfully delicious candies! This was a special challenge for the Daring Bakers because the good folks at http://www.chocoley.com offered an amazing prize for the winner of the most creative and delicious candy!

I think this might be the latest that I have ever completed a challenge and blogged about it. It is just under an hour away from the deadline for the reveal (although I guess I do really have tomorrow too to be considered on time on the 27th) and I am just now typing it up. The good thing is that the experience is fresh in my mind, the bad thing is that if there are any typing or grammar errors please chalk it up to the fact that I feel like I need to keep my eyelids open with toothpicks. 

While I enjoy making candy, and have some experience with making it, it is not something that I do very often. I think of making candy as being something more for the holidays to give away as little gifts. Add to that the fact that I am going back to work after taking a break for the last 4 1/2 years to stay at home with my son and you can imagine that I am pretty busy right now. However, that being said I did manage to squeak out this month's challenge.

I started with Almond Roca. This is something that I have made with my mom since I was a little kid. It is a persnickety candy in that you are dealing with heating sugar and butter to the hard crack stage and as I was reminded tonight, it can go from hard crack stage to ruined in the matter of a few seconds. My first batch was going along beautifully. I hadn't made it in a few years so I was trying to recollect if the recipe was correct in telling me to cook it to 350 degrees F since that seemed a bit high. While debating this I decided to go ahead and see where it took me. At about 275 to 280 degrees F the butter and sugar started to separate. I thought that since I hadn't made it in a while and couldn't remember what it transformed into next that maybe this was just a stage it was going through (like one of the many others in this process) and it would eventually get back to where it needed to be. I just needed to be patient and wait. Ummm, no. I was definitely wrong to continue past this point and should have trusted my initial instincts. I was a bit miffed that I wasted an entire pound of butter and two cups of sugar in the process, ending up with burnt sugar sitting underneath a layer of brown, burnt butter. Thankfully I had not tried to pour it on my chocolate and almonds so those were still salvageable.

I decided to give it one more go. After all, the chocolate and almonds needed something to go along with them and now that I knew what the butter and sugar looked like right before it turned I would be able to stop it at the right time. Yes and no. Right about 275 to 280 degrees F the mixture looked like it was starting to separate into two different entities again. So this time I just decided to stop it there before it quite reached the hard crack of 300 degrees F and pour it on the chocolate. I figured that even if it was a bit soft at least it wouldn't be burned. The verdict . . . yes it is softer than it should be (more of a dissolving sugar/butter than a hard toffee) but it still tastes like it should. However, I would still consider this a fail since it didn't turn out how it was supposed to.

Let's move on now to the chocolates. I had a really hard time deciding what type of chocolate to make. I really wanted to make a chocolate that was filled with a raspberry cream but it was so difficult to find a recipe to use. I should probably clarify that statement. There were many recipes out there but because I had never made a cream filled chocolate before I wasn't sure which ones would work and which ones wouldn't. Many of them also called for fondant which seemed a bit strange to me so I shied away from making a cream filled chocolate like I wanted to. Instead I decided to base my chocolate on a turtle with the addition of pretzel pieces.


Tempering the chocolate was an interesting experience. Personally I don't know if I even needed to do this process. I didn't have time to buy couverture chocolate so I went with Lindt chocolate already in bars. As you know, this chocolate is already tempered since they want their product to have a crisp sound and feel when breaking it into pieces and a shine upon unwrapping. I went ahead and chopped it into little pieces, melted it over my double boiler, but then struggled to get it down to the temperature that it needed to be. I kept adding chocolate pieces and chocolate pieces and chocolate pieces. Finally I got it down to a good temperature but not all the pieces melted and weren't going to. I heated it back up just for a second and it skyrocketed up 15 to 20 degrees F. Ugh. Now the process again of waiting for it to cool down. Finally it got down to about 90 degrees and I decided to take a leap of faith in getting the chocolates finished. I used a ladle to spoon the chocolate into the molds, stuck it in the fridge for 5 minutes, put in the caramel, pretzel pieces, and pecans, covered with more chocolate and let it sit in the fridge a bit longer.

Out popped beautiful chocolates! I cracked my cheapy little mold in the process but I was impressed by the shiny look of these guys, even to the point where you could see the reflections of the lights. If only they tasted as good as they looked. I know, I know, another fail, how could that be? The chocolate was way too dark and overpowering. I ended up using 85% cocoa and it was just so, so strong that you couldn't even taste the caramel, pretzel or pecan pieces. I was super disappointed. Did I say super, because I was SUPER disappointed. I hate spending money from our food budget on things that don't quite turn out. It is so disappointing. Did I already mention that I made two candy's tonight and both of them were disappointing. Yep, I thought so.

So, anyway . . . the Almond Roca really is a tasty candy if you can get it to the hard crack stage without burning it. I may try the chocolates again with milk chocolate (or a lower percentage dark chocolate) but right now I am candied out. Enjoy!

Note: Even though my Almond Roca didn't reach hard crack stage it actually stayed hard in the freezer.

Almond Roca
7 ounces milk chocolate bar (freeze ahead)
1 cup chopped almonds
2 cups sugar
1 pound butter

Grate frozen chocolate bar. Chop almonds. Cover a 9x13 cake pan with 1/2 cup almonds. Sprinkle 1/2 grated chocolate bar on top of almonds.

Melt butter over medium heat. Add sugar, stirring constantly until it is 300 degrees F or hard crack stage.

Pour immediately over grated chocolate and almonds. Spread evenly. Cover immediately with other half of chocolate bar and sprinkle with rest of almonds. Let stand to cool. Once cool, turn it out of the pan and break it up.

Wednesday, 27 July 2011

Daring Bakers - Fancy Fraisiers


Jana of Cherry Tea Cakes was our July Daring Bakers� host and she challenges us to make Fresh Frasiers inspired by recipes written by Elisabeth M. Prueitt and Chad Robertson in the beautiful cookbook Tartine.
 
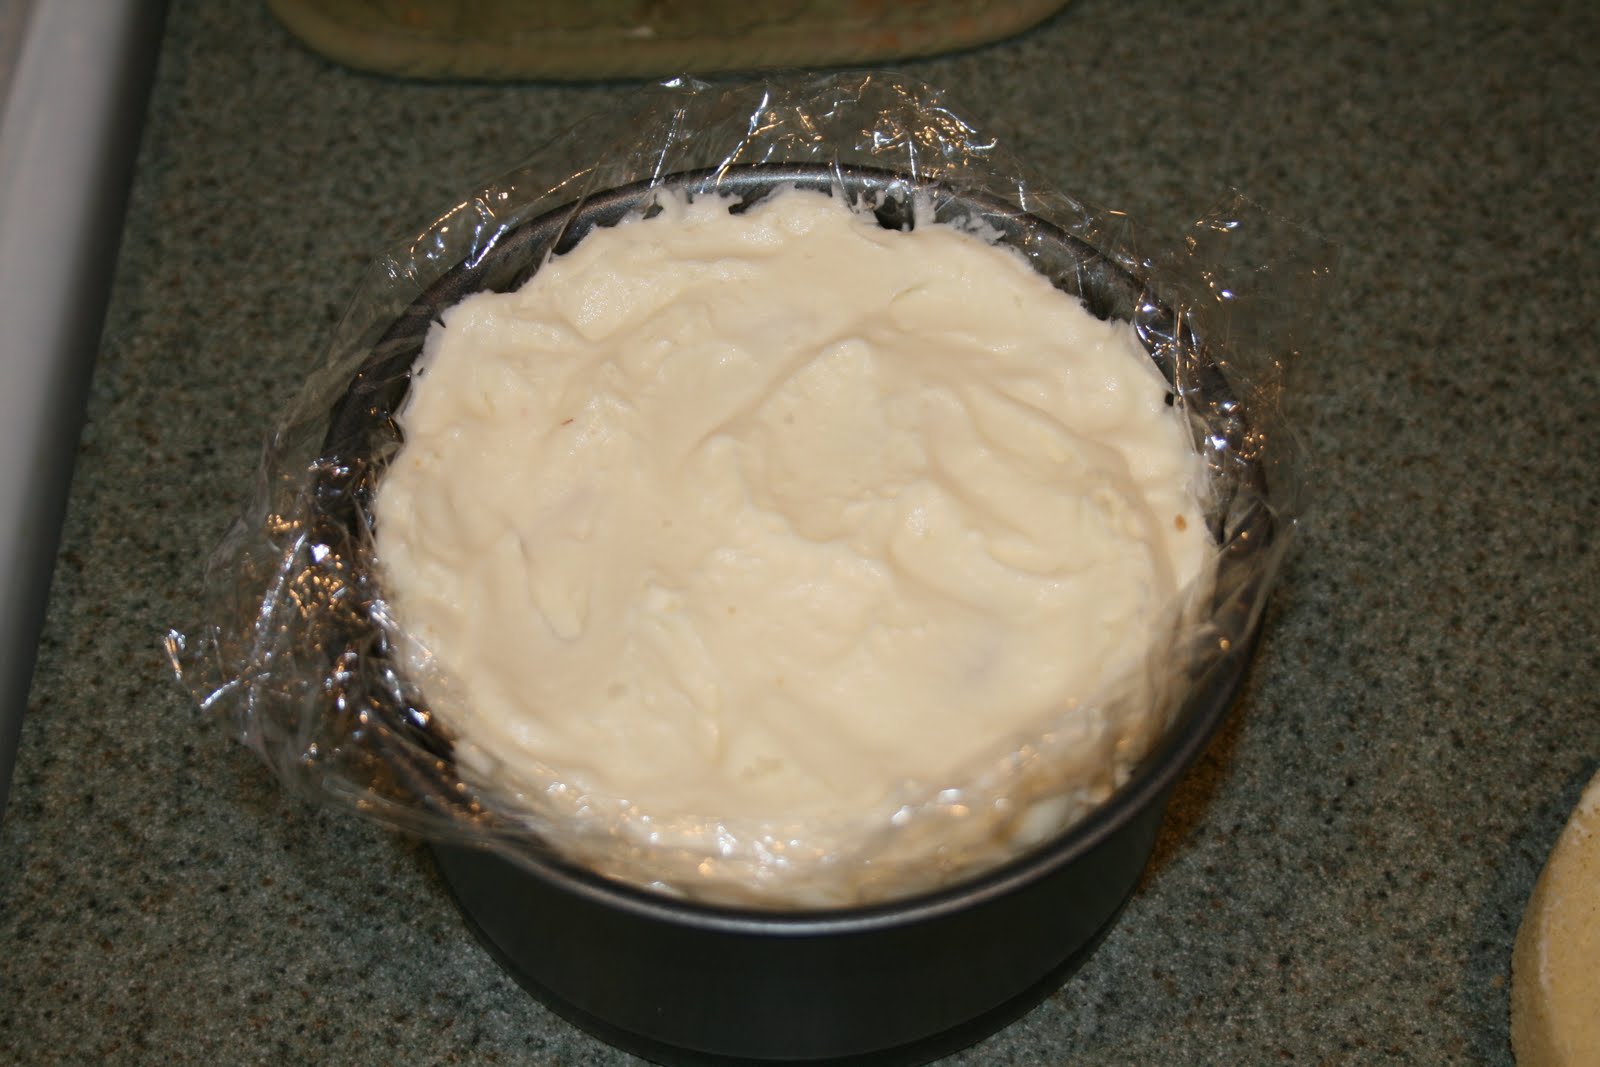
Fresh strawberries, light airy chiffon cake, fluffy pastry cream . . . who could resist this month's Daring Bakers challenge!  When I saw the challenge at the beginning of the month I knew that this would work perfectly for my two 5-inch springform pans. These would yield two small desserts, one for book group and one for my family. Little did I know that one 5-inch springform pan would yield more than enough for both groups combined. Oops, the hazards of trying to make something smaller.
 
I followed the recipe exactly and it was very straight forward. I baked the cakes the day before I needed the dessert and had them cooling on wire racks while I whipped up the pastry cream. I knew from past experience that this could sit in the fridge overnight along with the simple syrup. Making these ahead of time made for a bit less work on preparation day but there were still a lot of steps to do to get the whole thing together.
 
I'll spare you all the photos of making the cake, pastry cream, and simple syrup and just show you a quick assembly of the cake. For one of the cakes I did use the almond paste but for the other cake I did not. I liked the taste and look of the one without the almond paste a little better. I didn't think the almond paste added anything extraordinary and was really not a necessary item. The steps look involved but it really is a straight forward, simple recipe. Enjoy!


Fraisier
Chiffon Cake
1 cup + 2 tablespoons all-purpose flour
1 teaspoon baking powder
3/4 cups sugar
1/2 teaspoon salt, preferably kosher
1/4 cup vegetable oil
3 large egg yolks
1/3 cup + 1 tablespoon water
1 teaspoon pure vanilla extract
3/4 teaspoon lemon zest, grated
5 large egg whites
1/4 teaspoon cream of tartar
 
Preheat the oven to moderate 325�F. Line the bottom of an 8-inch spring-form pan with parchment paper. Do not grease the sides of the pan.
 
In a large mixing bowl, stir together the flour and baking powder. Add in all but 3 tablespoons of sugar, and all of the salt. Stir to combine.
 
In a small bowl combine the oil, egg yolks, water, vanilla and lemon zest. Whisk thoroughly. Combine with the dry ingredients and mix thoroughly for about one minute, or until very smooth.
 
Put the egg whites into a stand mixer, and beat on medium speed using a whisk attachment, until frothy. Add cream of tartar and beat on a medium speed until the whites hold soft peaks. Slowly add the remaining 3 tablespoons sugar and beat on a medium-high speed until the whites hold firm and form shiny peaks.
 
Using a grease free rubber spatula, scoop about ? of the whites into the yolk mixture and fold in gently. Gently fold in the remaining whites just until combined.
 
Pour the batter into the prepared pan. Bake for 45 to 55 minutes or until toothpick inserted into the center comes out clean.Remove the cake from the oven and allow to cool in the pan on a wire rack. To unmold, run a knife around the sides to loosen the cake from the pan and remove the spring form sides. Invert the cake and peel off the parchment paper. Refrigerate for up to four days.

Pastry Cream
1 cup whole milk
1/2 teaspoon pure vanilla extract
1/8 teaspoon salt, preferably kosher
2 tablespoons cornstarch
1/4 cup sugar
1 large egg
2 tablespoons unsalted butter
3/4 teaspoon gelatin
1/2 tablespoon water
1 cup heavy cream
 
Pour the milk, vanilla, and salt into a heavy sauce pan. Place over medium-high heat and scald, bringing it to a near boiling point. Stir occasionally.
 
Meanwhile, in a stand mixer add the cornstarch and sugar. Whisk to combine. Add the eggs to the sugar and cornstarch and whisk until smooth.
 
When the milk is ready, gently and slowly while the stand mixer is whisking, pour the heated milk down the side of the bowl into the egg mixture. Pour the mixture back into the warm pot and continue to cook over a medium heat until the custard is thick, just about to boil and coats the back of a spoon.
 
Remove from heat and pass through a fine mesh sieve into a large mixing bowl. Allow to cool for ten minutes stirring occasionally.
 
Cut the butter into four pieces and whisk into the pastry cream a piece at a time until smooth.
 
Cover the cream with plastic wrap, pressing the plastic wrap onto the top of the cream to prevent a skin from forming. Chill in the refrigerator until cool throughout. (Can be refrigerated for up to five days.)
 
In a small dish, sprinkle the gelatin over the water and let stand for a few minutes to soften. 
 
Put two inches of water into a small sauce pan and bring to a simmer over a medium heat.
 
Measure 1/4 cup of the chilled pastry cream into a small stainless steel/glass bowl that will sit across the sauce pan with the simmering water, without touching the water.
 
Heat the cream until it is 120 F. Add the gelatin and whisk until smooth. Remove from the water bath, and whisk the remaining cold pastry cream in to incorporate in two batches.
 
In a stand mixer, fitted with the whisk attachment, whip the cream until it holds medium-stiff peaks. Immediately fold the whipped cream into the pastry cream with a rubber spatula.
 
Vanilla Simple Syrup
1/3 cup sugar
1/3 cup water
1 tablespoon pure vanilla extract
 
Combine the water, sugar, and vanilla in a medium saucepan. Bring the mixture to a boil and let the sugar dissolve. Stirring is not necessary, but will not harm the syrup. Remove the syrup from the heat and cool slightly. Transfer syrup to a lidded container or jar that can be stored in the refrigerator. Simple syrup can be stored for up to one month.
 
Fraisier Assembly
1 baked 8-inch chiffon cake
1 recipe pastry cream filling
1/3 cup simple syrup
2 lbs strawberries
confectioners� sugar for dusting
1/2 cup almond paste, optional 
  
Line the sides of an 8-inch spring-form pan with plastic wrap. Do not line the bottom of the pan.
 
Cut the cake in half horizontally to form two layers. Fit the bottom layer into the prepared spring-form pan. Moisten the layer evenly with the simple syrup. When the cake has absorbed enough syrup to resemble a squishy sponge, you have enough.
 
Hull and slice in half enough strawberries to arrange around the sides of the cake pan. Place the cut side of the strawberry against the sides of the pan, point side up forming a ring.
 
Pipe cream in-between strawberries and a thin layer across the top of the cake.
 
Hull and quarter your remaining strawberries and place them in the middle of the cake. Cover the strawberries and entirely with the all but 1 tablespoon of the pastry cream.
 
Place the second cake layer on top and moisten with the simple syrup. 
 
Lightly dust a work surface with confectioners' sugar and roll out the almond paste to an 8-inch round 1/16 inch thick. Spread the remaining 1 tablespoon of pastry cream on the top of the cake and cover with the round of almond paste.
 
Cover with plastic wrap and refrigerate for at least 4 hours. 
 
To serve release the sides of the spring form pan and peel away the plastic wrap Serve immediately or store in the refrigerator for up to 3 days.
 

Monday, 27 June 2011

Daring Bakers - Baklava


Erica of Erica�s Edibles was our host for the Daring Baker�s June challenge. Erica challenged us to be truly DARING by making homemade phyllo dough and then to use that homemade dough to make Baklava.

Baklava. Not a dessert that I usually raise my hand for. At least not until I saw that I could change up the ingredients so that instead of being drenched in honey and over the top sweet I could substitute chocolate, a variety of nuts, and a less sweet syrup. Now my hand might just be raising. 

I believe this was my first go round of making baklava, but for some reason I am not 100% sure. I know that probably sounds a bit strange, not remembering if I have ever made something before, but I can't remember if I made this in a high school home economics class or when I was younger. I seem to have some vague recollections of making baklava. Either way, I know that I had never made homemade phyllo dough. That was definitely going to be a challenge.
I think I gave myself some practice with patience and rolling dough when I made homemade whole wheat tortillas for our breakfast burritos that morning. When it came time to roll out my phyllo dough I felt like I was very calm, cool, and collected which is exactly what I needed to be in order to have a successful experience. What I didn't realize was that it was going to take me over an hour and a half to roll out 18 sheets of very thin dough. Over 90 minutes! Yikes! I was somewhat surprised that the time actually went by pretty quickly.


I decided to break my dough into 18 small balls ahead of time to make sure that I had enough dough to do all the layers I wanted. I am sure I didn't get them as transparent as some people were able to but I was very pleased with how they turned out. My one big mistake was not layering them with wax paper between the layers. I thought that because I generously floured them they wouldn't stick together. I even checked between layers every now and then to make sure that I could get them apart easily. And still . . . 


. . . they managed to stick together. It wasn't really apparent until I got to the stage of cutting the sheets to fit the size of the pan. I used a pizza cutter thinking that would be the best way to go but I was sorely mistaken. Between the warm kitchen and the blade of the cutter and the weight of the sheets on top of each other the edges adheared together. The center of the sheets were still separate but the edges became one.


The first few came apart fine. In fact, I was a bit giddy with how smoothly it was seeming to go. After the first layer of 6 sheets my joy was quickly overshadowed by frustration. By the time I came to the last few sets of layers I was literally peeling off strips and piecing them together. It felt a bit like I was wrapping a mummy. I had to use the scraps which I was going to save to make into another pieced together dessert but that's okay. At least I didn't have to re-roll any sheets or start from scratch.


Next step, toasting the nuts and getting together the ingredients for the filling. I chose to use nutella and a combination of toasted hazelnuts, toasted walnuts, toasted almonds, and roasted pistachios. I was also a bit surprised by how long it took me to do the layering. Then there was the cutting. All together another 30-60 minutes before getting it into the oven for baking. After the baking was done the syrup was poured on and it was allowed to sit and sit and sit. As the syrup sits it oozes down into the lower layers until everything has been coated. You can see below the baklava before baking, after baking, and after syrup.


Even though the baklava is supposed to sit overnight in order to absorb the syrup you can imagine that it wasn't very long before we felt the desire to do an informal taste test. Just consider it part of research, you know, the need to check the taste and texture right after baking, after sitting for a few hours, and after sitting overnight.


Overall I was happy with how this baklava turned out. It was a lot of work to roll out all the sheets of phyllo dough but I'm glad I did it. Will I do it again? Not sure. If I do, I will probably use refrigerated dough since it is faster and I don't know that people would be able to tell the difference. And as I said before, I am not a big baklava fan in the first place so I will probably use my other opportunities to expand my repertoire.


Baklava

Phyllo Dough 
Makes 18 sheets for 9x9 pan

1 1/3 cups unbleached all-purpose flour
1/8 teaspoon salt
1/2 cup less 1 tablespoon water, plus more if needed
2 tablespoons vegetable oil
1/2 teaspoon cider vinegar

In the bowl of your stand mixer combine the flour and salt. Mix with paddle attachment.

Combine water, oil, and vinegar in a small bowl. Add water and oil mixture to flour with mixer on low speed. Mix until you get a soft dough. (If it appears dry, add a little more water.)

Change to the dough hook and let knead approximately 10 minutes. (20 minutes if you are kneading by hand)

Remove the dough from the mixer and continue to knead for 2 more minutes. Pick up the dough and throw it down hard on the counter a few times during the kneading process.

Shape the dough into a ball and lightly cover it with oil. Wrap tightly in plastic wrap and let sit 30-90 minutes (longer is best).

Unwrap your dough and divide into chunks slightly larger than a golf ball. Keep the rest of the dough covered so it doesn't dry out.

On a heavily floured surface, roll out each chunk of dough until it is as thin as you can get it. Continue adding flour (you can't over flour), and it's okay if you get rips in the dough since you just need the top piece to be perfect.

When you get the dough as thin as you can, pick it up and place it on a well floured surface. I would suggest putting wax paper between layers if you don't want the edges to stick when you cut to size.

Trim phyllo sheets to fit in your pan. Set aside.

****
Filling  
1 cup hazelnut-chocolate spread (such as Nutella) 1/2 cup toasted hazelnuts, coarsely chopped 
1/2 cup roasted pistachios, coarsely chopped 
1/3 cup blanched toasted almonds, coarsely chopped 
1/3 cup toasted walnuts, coarsely chopped 
1/2 teaspoon ground cinnamon 
1/8 teaspoon salt
1/2 cup melted butter


Preheat oven to 350�.

Place hazelnut-chocolate spread in a microwave-safe bowl; microwave at HIGH for 30 seconds or until melted. Combine hazelnuts and next 5 ingredients (through salt).

Brush 9x9 baking pan with melted butter.  Repeat procedure with 5 phyllo sheets and butter. Drizzle about 1/3 cup melted hazelnut-chocolate spread over phyllo. Sprinkle evenly with one-third of nut mixture (about 1/2 cup). Repeat procedure twice with 4 sheets of phyllo, butter, hazelnut-chocolate spread, and nut mixture. Top last layer of nut mixture with remaining 5 sheets phyllo, each lightly brushed with butter. Press gently into pan. Tuck in all the edges to give it a nice appearance.

With a sharp knife cut baklava into desired shapes and number of pieces. (If you can't cut all the way through you will be able to cut it later.) A 9x9 cuts into 30 pieces nicely. Brush top layer generously with butter making sure to cover the entire area and every edge.

**Make syrup while baklava is baking**

Bake at 350� for about 30 minutes; remove from oven and cut again all the way through. Continue baking until golden brown (for me it was about 5 more minutes, for some about 30 minutes). Remove from oven.
Drizzle honey mixture over baklava. Cool in pan on a wire rack. Cover; store at room temperature.
    ****
    Syrup
    3/4 cup honey 
    1/2 cup water 
    1 (3-inch) cinnamon stick


    Combine the first 3 ingredients in a medium saucepan over low heat; stir until honey dissolves. Increase heat to medium; cook, without stirring, until a candy thermometer registers 230� (about 10 minutes). Remove from heat; keep warm. Discard cinnamon stick.

    Wednesday, 27 April 2011

    Daring Bakers - Maple Mousse in an Edible Container

     
    The April 2011 Daring Bakers� challenge was hosted by Evelyne of the blog Cheap Ethnic Eatz. Evelyne chose to challenge everyone to make a maple mousse in an edible container. Prizes are being awarded to the most creative edible container and filling, so vote on your favorite from April 27th to May 27th at http://thedaringkitchen.com!

    I was excited to take on the Daring Bakers challenge this month. For a very, very long time I have wanted to make an edible cookie bowl. In fact, I had it on my list of my top 100 things to bake and have looked longingly at a certain recipe card in my notebook for many years. I never really had a reason to make one up to this point so it was great to have an excuse.

    The first one I made went together beautifully and then as I was transferring it from the pan to the cooling rack, perched precariously on two cookie spatulas, it totally fell apart on my counter. I had an inkling of what was coming but my poor husband, who I had just asked to help, was totally bewildered and thought I might blame him for the mishap. What can a girl do except get right to work on another one with the leftover dough.


    While forming the second cookie bowl, I nibbled on the pieces from the first. I only wish it had tasted as good as all my good thoughts about it over those many years that I had looked longingly at the recipe. It was pretty blah. My only hope was that it would improve once the mousse was in the bowl.

    Other Daring Baker challenges have given me the opportunity to make mousse and while I don�t make it often I wasn�t nervous about making it. I was curious as to the taste, though. I love a good maple bar (a doughnut with maple frosting) and I enjoy a bit of pure maple syrup on my pancakes and waffles, but the thought of a whole serving of maple mousse had me a bit perplexed as to how it was going to taste.


    The mousse went together nicely. There were no mishaps with the preparation of this item and I was really looking forward to tasting the finished product. And oh my goodness was it rich! One spoonful was enough for me. Of course, with that first tasting I admit to eating more than one spoonful but it was only because I wanted to get all the crispy pieces of ham eaten up. After that though, I was able to leave the mousse in the fridge and just take a spoonful every now and then and feel content.

    One thing that was a bit off for me was the temperature. When tasting my first serving I hadn�t left it in the fridge very long so it was set up but it wasn�t really cool. I expected then that when I had subsequent servings, after sitting in the fridge even a few days later, the mousse would be cold. However, every bite I took seemed like it was the same temperature as when I first put it in. Strange, not sure what that was all about. But it did make me think that maybe I will look for some maple ice cream flavors to try since I really enjoyed the maple flavor but was looking for something cool.

    By the way, some Daring Bakers added bacon into the mix. I thought I would also cook up some bacon to sprinkle on the top, but wouldn�t you know that the day I completed the challenge I had no bacon in my fridge. I did have a few pieces of shaved ham so I decided to crisp those up and crumble them on top. It probably was not as enjoyable as bacon would have been, but it did give it some nice crunch in every bite. Enjoy!


    Edible Cookie Bowl Recipe
    1 1/4 cups all-purpose flour
    1/2 cup unsweetened cocoa powder
    1/4 cup blanched, slivered almonds, finely ground
    1/2 teaspoon salt
    4 tablespoons butter, softened
    2/3 cup sugar
    1 egg
    1/2 teaspoon vanilla extract

    Cover the outside of a loaf pan with foil. Spray with vegetable cooking spray.

    In a medium bowl, combine flour, cocoa powder, almonds, and salt. In a large bowl, using an electric mixer set on medium, beat butter, sugar, egg, and vanilla until light and fluffy. Add flour mixture; beat until a dough forms, about 2 minutes.

    Preheat oven to 350 degrees F. Roll dough out to 1/8-inch thickness. Using a 1 1/2-inch cookie cutter with scalloped edges, cut out shapes.

    Cover pan with cutouts, overlapping and pressing them slightly.

    Bake cookie bowl until edges are firm, about 15 minutes. Transfer pan to a wire rack and cool completely.

    To remove the cookie bowl, carefully lift it off the foil-lined pan. Remove foil.

    Maple Mousse
    1 cup pure maple syrup (not maple-flavoured syrup)
    4 large egg yolks
    1 tablespoon unflavored gelatin
    1 1/2 cups whipping cream (35% fat content)

    Bring maple syrup to a boil then remove from heat.

    In a large bowl, whisk egg yolks and pour a little bit of the maple syrup in while whisking (this is to temper your egg yolks so they don�t curdle). Add warmed egg yolks to hot maple syrup until well mixed.

    Measure 1/4 cup of whipping cream in a bowl and sprinkle it with the gelatin. Let it rest for 5 minutes. Place the bowl in a microwave for 45 seconds (microwave for 10 seconds at a time and check it in between) or place the bowl in a pan of barely simmering water, stir to ensure the gelatin has completely dissolved.

    Whisk the gelatin/whipping cream mixture into the maple syrup mixture and set aside.

    Whisk occasionally for approximately an hour or until the mixture has the consistency of an unbeaten raw egg white.

    Whip the remaining cream. Stir 1/4 of the whipped cream into the maple syrup mixture. Fold in the remaining cream and refrigerate for at least an hour. Remove from the fridge and divide equally among your edible containers.

    Sunday, 27 March 2011

    Daring Bakers - Meringue Filled Coffee Cake


    The March 2011 Daring Baker�s Challenge was hosted by Ria of Ria�s Collection and Jamie of Life�s a Feast. Ria and Jamie challenged The Daring Bakers to bake a yeasted Meringue Coffee Cake. 
    I am not one to jump right into the challenge recipe at the beginning of the month. I usually like to read the challenge over a few times, let it ruminate in my brain, pondering technique and flavors. However, since our family is trying to limit our sugar intake I thought that I would combine the challenge with another special date this month . . . my husband�s birthday which happens to fall early in the month.

    Since Christmas, he has been asking for me to make the cinnamon rolls I made Christmas morning. I had planned to make them for his birthday breakfast so I begged and pleaded with him to let me make this coffee cake instead since they sounded fairly similar. He reluctantly agreed, offering to make a deal that if they were not as good I would still make the cinnamon rolls sometime this month. In my counter offer I asked who was to be the judge of whether they were equal. He stated he would try to be as unbiased as possible. Yah right, unbiased, my foot!


    There were a few steps to this challenge but not any more so than a cinnamon roll or another sweet yeast bread recipe. It involved making the dough, letting it rise, kneading the dough, spreading it with meringue and adding filling, rolling it up, letting it rise again, and then baking it. Of course, there is a bit more to it than that but those are the steps in a nutshell.


    The dough recipe made two braided wreath coffee cakes and while I seriously debated just doing one I decided that I would make two because in the end I wanted one that had the same cinnamon roll filling (for equal comparison) and then one that had chocolate in it.

    Of the many times I�ve made yeast breads this was the first time of ever melting the butter mixture, adding the yeast to the dry flour and then adding a somewhat cooled butter mixture to the dry flour and yeast. 


    Have I ever mentioned before how much I love kneading dough? I love it! Nothing makes me feel like a baker more than kneading soft dough after it is warm and has risen a first time! This particular dough didn�t require a lot of work to get it to the smooth, elastic stage so it was really nice to work with.


    I don�t work with meringue often. I have really only made it a handful of times so I was a little more anxious to have this turn out correctly. It seemed to turn out fine. Nice stiff peaks and easy to spread on the dough.


    Besides the coffee cakes looking like molten lava when they came out of the oven they tasted great! I thought the cinnamon/sugar filling was going to be way too sweet but it wasn�t too over the top. I think I did prefer the chocolate filling though but that might be because I really like chocolate. The one thing I forgot to do on both, and I�m not sure why, was to brush the egg wash on after baking. It didn�t really matter in the end because I sprinkled powdered sugar or cocoa powder over the finished product.


    As for the unbiased ruling from the judge, it really wasn�t unbiased. He enthusiastically enjoyed both coffee cakes and then pronounced that I would have to make the cinnamon rolls in the end so that he could make an accurate comparison. Hmmm, kind of thought that was going to happen. 

    Meringue Filled Coffee Cake

    Yeast Coffee Cake:
    4 cups flour
    � cup sugar
    � teaspoon salt
    1 package active dried yeast
    � cup whole milk
    � cup water
    � cup unsalted butter, room temperature
    2 large eggs, room temperature

    Meringue:
    3 large egg whites, room temperature
    � teaspoon salt
    � teaspoon vanilla
    � cup sugar

    Filling:
    1 cup chopped pecans or walnuts
    2 tablespoons granulated sugar
    � teaspoon ground cinnamon
    1 cup semisweet chocolate chips or coarsely chopped chocolate

    Egg wash: 1 beaten egg
    Cocoa powder (optional) and confectioner�s sugar (powdered/icing sugar) for dusting cakes


    Prepare the dough:
    In a large mixing bowl, combine 1 � cups of the flour, the sugar, salt and yeast.

    In a saucepan, combine the milk, water and butter and heat over medium heat until warm and the butter is just melted.

    With an electric mixer on low speed, gradually add the warm liquid to the flour/yeast mixture, beating until well blended. Increase mixer speed to medium and beat 2 minutes. Add the eggs and 1 cup flour and beat for 2 more minutes.

    Using a wooden spoon, stir in enough of the remaining flour to make a dough that holds together. Turn out onto a floured surface (use any of the 1 � cups of flour remaining) and knead the dough for 8 to 10 minutes until the dough is soft, smooth and elastic, keeping the work surface floured and adding extra flour as needed.

    Place the dough in a lightly greased bowl, turning to coat all sides. Cover the bowl with plastic wrap and a kitchen towel and let rise until double in bulk, 45 � 60 minutes.

    Prepare your filling:
    In a small bowl, combine the cinnamon and sugar for the filling. You can add the chopped nuts to this if you like, but I find it easier to sprinkle on both the nuts and the chocolate separately.


    Once the dough has doubled, make the meringue:
    In a clean mixing bowl � ideally a plastic or metal bowl so the egg whites adhere to the side (they slip on glass) and you don�t end up with liquid remaining in the bottom � beat the egg whites with the salt, first on low speed for 30 seconds, then increase to high and continue beating until foamy and opaque. Add the vanilla then start adding the � cup sugar, a tablespoon at a time as you beat, until very stiff, glossy peaks form.

    Assemble the Coffee Cakes:
    Line 2 baking/cookie sheets with parchment paper.

    Punch down the dough and divide in half. On a lightly floured surface, working one piece of the dough at a time (keep the other half of the dough wrapped in plastic), roll out the dough into a 20 x 10-inch rectangle. Spread half of the meringue evenly over the rectangle up to about 1/2-inch from the edges. Sprinkle half of your filling of choice evenly over the meringue.


    Now, roll up the dough jellyroll style, from the long side. Pinch the seam closed to seal. Very carefully transfer the filled log to one of the lined cookie sheets, seam side down. Bring the ends of the log around and seal the ends together, forming a ring, tucking one end into the other and pinching to seal.

    Using kitchen scissors or a sharp knife, make cuts along the outside edge at 1-inch intervals. Make them as shallow or as deep as desired but don�t be afraid to cut deep into the ring.

    Repeat with the remaining dough, meringue and fillings.

    Cover the 2 coffee cakes with plastic wrap and allow them to rise again for 45 to 60 minutes.

    Preheat the oven to 350�F.

    Brush the tops of the coffee cakes with the egg wash. Bake in the preheated oven for 25 to 30 minutes until risen and golden brown. The dough should sound hollow when tapped.

    Remove from the oven and slide the parchment paper off the cookie sheets onto the table. Very gently loosen the coffee cakes from the paper with a large spatula and carefully slide the cakes off onto cooling racks.

    Allow to cool. Just before serving, dust the tops of the coffee cakes with confectioner�s sugar as well as cocoa powder if using chocolate in the filling. These are best eaten fresh, the same day or the next day.
     
    Makes 2 round coffee cakes, each approximately 10 inches in diameter. The recipe can easily be halved to make one round coffee cake.